Growing maitake mushrooms means forcing a piece of indoor climate to act like an autumnal oak forest, which requires incubating the mycelium at 68 to 75 degrees Fahrenheit before hitting it with a sharp temperature drop to trigger pinning. This is a precise process. It takes real patience. We tested dozens of variables to isolate a methodology for consistent home cultivation, mostly because commercial guides tend to gloss over the precise carbon-to-nitrogen ratios required for massive yields. We tracked colonization rates across different substrate blends to find what actually works. Our protocol skips the common pitfalls that inevitably lead to green mold and stalled blocks.
Key Takeaways
- 1Maitake takes 3 to 4 months from inoculation to harvest, including an 8-week colonization phase before fruiting conditions can be initiated
- 2An 80/20 blend of oak sawdust and wheat bran hits the optimal carbon-to-nitrogen ratio. Adding agricultural gypsum locks substrate pH at 4.0 for faster colonization
- 3Sterilize grow bags at 15 PSI for at least two hours. Skipping or shortening this step is the primary cause of green mold contamination
- 4Fruiting requires a sharp drop to 50-60F paired with humidity above 85%. Without that temperature shock, the mycelium refuses to pin
What You Need
Preparation dictates success here. Gather the supplies. We start with a base of fine hardwood sawdust mixed with a nitrogen-rich kicker like wheat bran or soybean hulls. You will need a heavy-duty pressure cooker. It must hold fifteen pounds per square inch for at least two hours to thoroughly sterilize those hardwood blocks. Buy pure liquid culture or first-generation grain spawn from a trusted mycology vendor. Do not use softwoods. Pine and cedar pack natural antifungal resins that kill mycelium on contact. Set up a dedicated fruiting tent with an ultrasonic humidifier and an exhaust fan to manage the microclimate.
A 2025 study in Horticulturae revealed that holding the substrate at a slightly acidic pH of 4.0 maximizes mycelial density and accelerates the colonization phase, which gives the fungus a massive head start before opportunistic molds can take hold in the bag. Agricultural gypsum dials in this exact acidity. Never guess the moisture content. Guessing the water ratio almost always invites bacterial rot.
Step 1 - Substrate Preparation
Maitake eats complex wood lignins. Moisture matters immensely. A 2018 study in AMB Express demonstrated that supplementing standard hardwood sawdust with wheat bran or corn cob increases the biological efficiency by almost forty percent. We measure out eighty percent oak sawdust and twenty percent wheat bran by weight, tossing in a handful of agricultural gypsum to supply calcium and lock in the pH during that long digestion phase. Stir the dry dust thoroughly before adding any liquid. If the nutrients clump up, the fungus grows in unpredictable patchy bursts. Those empty uncolonized zones are open doors for bacteria.
Pour water in slowly until the batch hits sixty percent hydration. Grab a handful and squeeze. A couple drops should slip between the knuckles. While wild Grifola frondosa prefers the rotting roots of ancient oaks, we find the biggest indoor harvests come from hitting that twenty percent bran ratio and nailing the water content perfectly. Pack the wet medium into heavy autoclavable bags fitted with a 0.2-micron filter patch, taking care to wipe the inner gussets completely clean before folding them loosely for the thermal processing stage.
Step 2 - Sterilization Protocol
Heat kills the competition. Do not rush this step. Raw wood hides millions of dormant mold spores and bacterial endospores that will easily outrun the slow-moving maitake mycelium, so we boil the bags at extreme pressure to obliterate everything before it wakes up. Load the folded grow bags into the pressure cooker. Keep them elevated on a metal rack so the boiling water doesn't melt the plastic bottoms. Bring the gauge up to fifteen pounds per square inch. Hold it there for at least two full hours. If you poured massive five-pound blocks, stretch that cook time to three hours just to guarantee the steam penetrates the inner core.
Kill the heat. Let the thick pot depressurize naturally overnight on the stove. Cracking the lid too early causes a violent pressure shift that blows the bags wide open. The cooked sawdust absolutely must drop to room temperature before you introduce the culture. Thermal shock destroys delicate mycelium on contact.
Step 3 - Inoculation and Spawn Run
Clean the workspace. Wash hands thoroughly. Airborne dust is the number one reason mushroom blocks fail. We always do this sensitive transfer work inside a still air box or in front of a laminar flow hood. Drench the interior surfaces and the outside of the spawn jar with seventy percent isopropyl alcohol. Smash the colonized grain into loose individual kernels. Crack the cooled substrate bag open just enough to dump the spawn inside. We aim for a ten percent spawn ratio to push a faster colonization rate. Seal the plastic shut immediately with an impulse sealer or heavy packing tape.
Now shake the bag violently. Scattering those grain kernels evenly through the wood ensures the fungal network attacks the block from hundreds of starting points at once, drastically shrinking the window for invasive green molds to gain a foothold. Write the date and strain on the plastic. We track these metrics to see which cultures run the fastest.
Step 4 - Incubation Conditions
Keep the room dark. Leave the bags alone. You want to hold the ambient air between 68 and 75 degrees Fahrenheit while the fungus eats. White threads will creep outward from the inoculation points, eventually knitting the loose sawdust into a hard block. Unlike aggressive oyster mushrooms that can chew through a substrate bag in a matter of days, this particular species operates on an incredibly sluggish metabolic timeline and demands absolute environmental stability to avoid stalling out prematurely.
Resist the urge to handle the bags for the first three weeks. Squeezing the plastic snaps the microscopic hyphae. That forces the organism to waste energy rebuilding its broken network. As the block finally matures, the surface starts sweating tiny pools of amber liquid. This yellowish exudate proves the fungus has exhausted the local food supply. Soon after, hard dark lumps will push up through the top layer. Those ugly knots are primordia. Once they form, it is time to drop the temperature.
Step 5 - Fruiting Induction
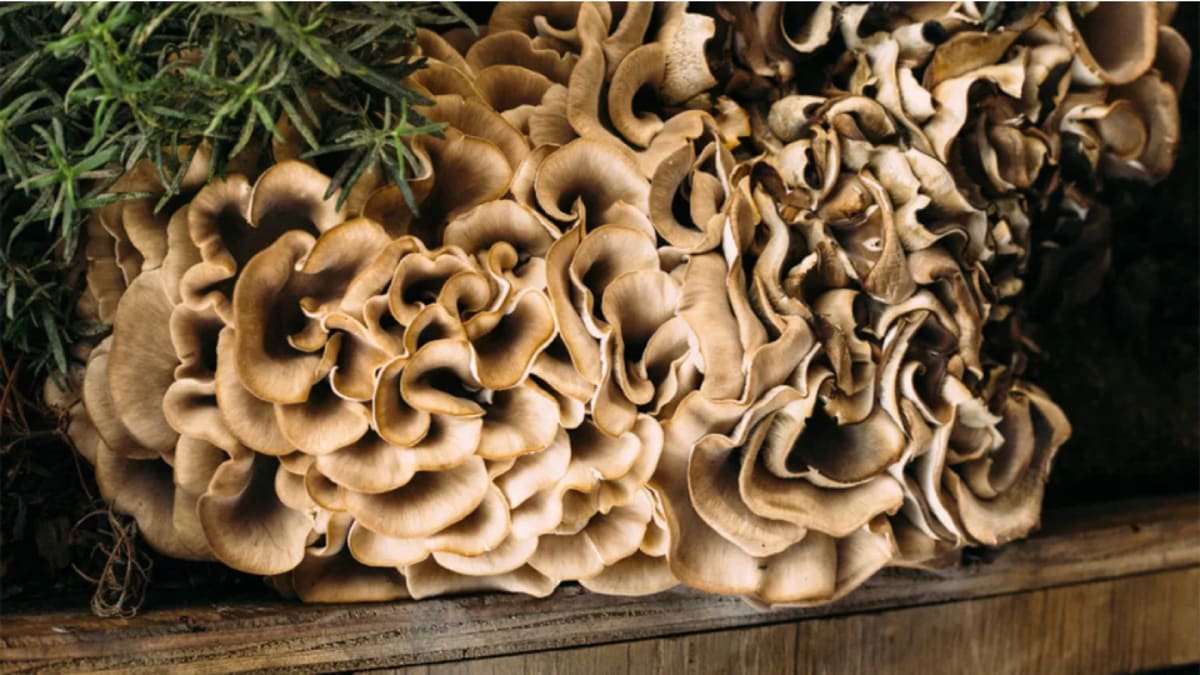
Lower the heat. Crank the airflow. We have to fake the transition from a sticky late summer to a crisp autumn storm. The mycelium refuses to form mature fruiting bodies until it feels a sharp temperature drop to somewhere between 50 and 60 degrees Fahrenheit, closely paired with a massive humidity spike above 85 percent. Slice the top off the grow bag. Exposing the block to direct oxygen tells the organism exactly where to push the mushrooms out. Keep an ultrasonic humidifier pumping mist into the tent. Give them 12 hours of indirect light daily with a basic cool white LED. Fungi do not photosynthesize. They just use the light source to figure out which way is up.
You have to run an exhaust fan. It pulls dense carbon dioxide out of the enclosure. If CO2 pools near the floor, the stems stretch into weird mutant shapes. The caps stay completely stunted. Given enough fresh air, those dark lumps unpack themselves into a gorgeous cluster of overlapping brown fronds.
Step 6 - Harvesting and Storage
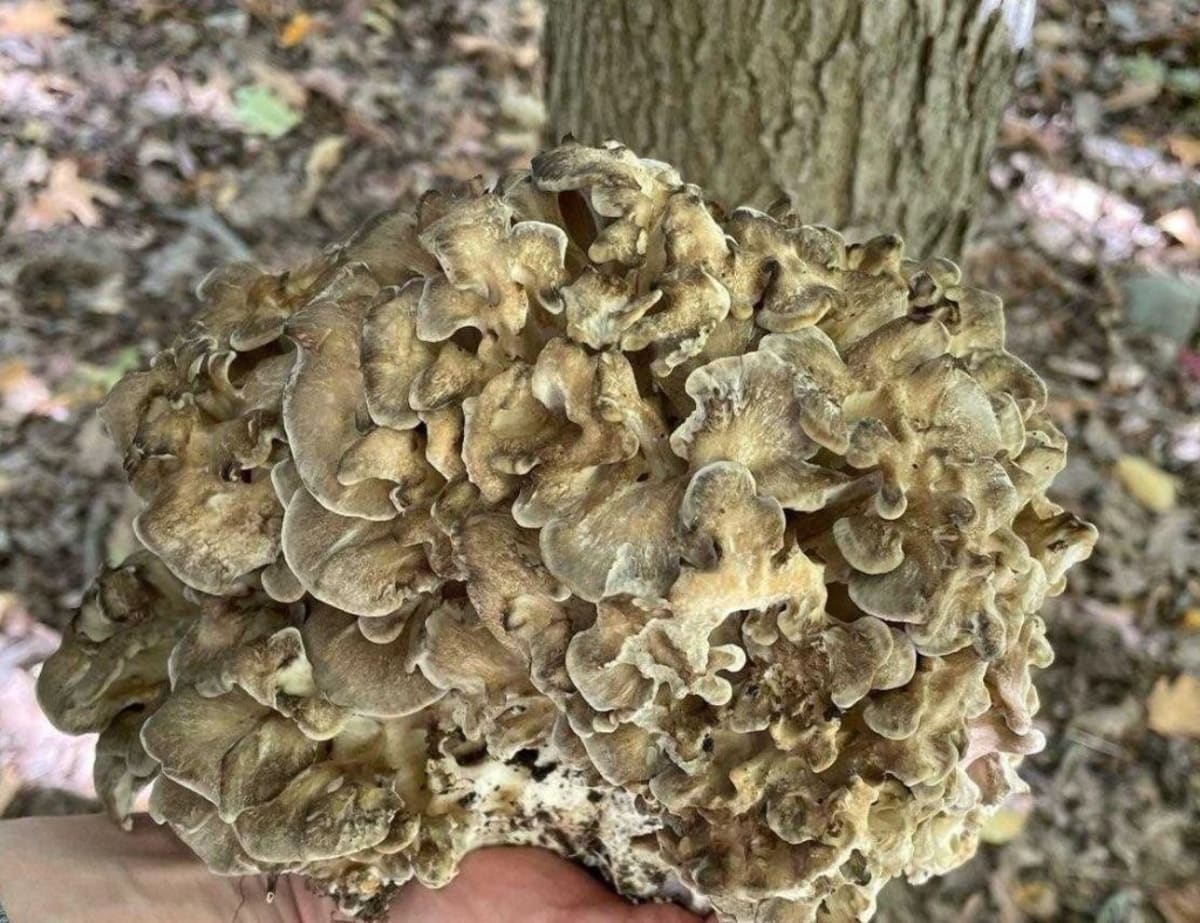
Cut the base. Store them cold. Never wait for the caps to flip up and dump spores. We pull the whole cluster while the outer edges of the fronds still curl downward. The mushroom should feel tight. Take a clean knife and slice horizontally through the woody central core, getting as close to the sawdust block as you can possibly manage without actually digging into the sterile dirt. Do not rip the fungi away with your bare hands. That just tears chunks of uncolonized wood into the harvest.
Because these delicate leaves bleed moisture the second you detach them from the main mycelial network, drop the fresh clusters straight into breathable paper bags and throw them in the fridge to lock in that meaty texture. Knock off any stray sawdust with a pastry brush. Never wash them under the tap. The porous flesh acts exactly like a dry sponge. They usually stay firm for ten days in the crisper.
Common Mistakes
Airflow dictates the yield. Bad air ruins blocks. People forget how sensitive this fungus is to stale air. Poor ventilation forces the young caps to mutate into stunted, ugly coral shapes instead of spreading out into broad fronds. Passive air exchange is never enough. Wire an active exhaust fan to a digital timer so it purges the tent completely every couple of hours.
Another classic mistake involves mixing up batches with old wood pellets. The mycelium needs intact lignins to survive a long incubation. Sawdust left out in the rain yields stringy growth. Buy fresh hardwood direct from the mill. Beginners also frequently panic and throw away completely healthy bags. They see the mycelium turning brown and assume the worst. As the block ages, the top surface naturally forms a tough crust. This armor is a normal biological defense mechanism. If you spot bright green dust or powdery black patches rapidly expanding across the white mycelium, that is a genuine contamination event, and you need to throw the bag directly into an outside trash bin before the parasitic mold drops spores all over the sterile tent.
Frequently Asked Questions

A dedicated wellness researcher who spent decades cataloging the impact of forest-based nutrition on human aging. Ashley doesn't care about trends; she cares about the data.