Cultivating Cordyceps militaris indoors demands sterilized brown rice and a nutrient-dense liquid broth. You also need intense lighting. Strict temperature control is non-negotiable. We tested both container methods in our own lab space to see what actually works. Forget about growing the famous Cordyceps sinensis at home. That wild species requires living insect hosts alongside freezing high-altitude conditions. The militaris strain adapts well to cheap grain substrates. A 2024 study in the journal Diversity confirms it holds identical primary active compounds, making it the only realistic choice for home growers who want to harness cordyceps for energy and athletic performance.
We tracked the complete life cycle to figure out the best practices for amateur mycologists. Our protocol cuts the guesswork right out of the tricky incubation phase. Beginners usually fail here because they misunderstand the delicate relationship between carbon dioxide levels and early mycelial expansion. We mapped out the exact timeline and environmental triggers you need to produce potent fruiting bodies in a standard spare bedroom, bypassing the need for expensive laboratory equipment or specialized commercial clean rooms entirely.
Key Takeaways
- 1Cordyceps militaris is the only strain that grows at home on grain - no insects required
- 2Sterilize substrate at 15 psi for 45 minutes using a proper pressure cooker, not an Instant Pot
- 3Colonize in darkness at 68°F, then shift to 65°F with 12 daily hours of LED light to trigger fruiting
- 4Harvest when dark perithecia specks appear on club tips, then dry at 100°F for 15 hours
The Biology of Indoor Cultivation
Grasping basic fungal metabolism saves a lot of wasted grain later. The fungus simply treats the brown rice as a substitute caterpillar body. Out in the wild the spores land on an insect and slowly dissolve its internal organs before pushing a bright orange reproductive club right out of the host's head. Our indoor method replicates this exact biological sequence using plant carbohydrates instead of bugs.
During those early growth stages the mycelium feeds exclusively on the simple sugars floating in the liquid broth. Fast energy lets the organism conquer the grain quickly. Once it exhausts those easy calories it begins tearing apart the complex starches locked deep inside the tough outer bran layer of the rice kernels. This secondary metabolic phase takes quite a bit longer.
A 2023 study in Fermentation demonstrated that maintaining a broth pH of exactly 5.5 maximizes cordycepin production during the final fruiting stage, proving that early nutritional conditions directly dictate the ultimate medicinal value of the harvest.
What You Need
Setting up a home mycology lab demands real precision. You need the right gear. It matters. Sourcing high-quality ingredients dictates whether the operation succeeds or ends in a moldy mess. We strongly suggest buying laboratory-grade components rather than grocery store alternatives whenever you can.
The Hardware
Sterilization requires a massive pressure cooker capable of reaching and holding 15 psi for a couple of hours. An instant pot will not work. It simply cannot reach the temperature needed to kill dormant bacterial endospores. Home cultivators also need pint-sized wide-mouth glass jars and medical-grade micropore tape, alongside a spray bottle filled with 70 percent isopropyl alcohol and basic 6500K LED light strips to trigger the final fruiting phase.
The Substrate and Broth
The food source consists of two parts. Use long-grain brown rice and a custom hydration fluid. For every 500 milliliters of distilled water add one tablespoon of light malt extract and one tablespoon of nutritional yeast. Avoid white rice completely. The commercial milling process strips away the protective bran layer. That leaves a mushy core that turns into a useless sticky paste during pressure cooking.
The Genetics
Purchase a liquid culture syringe of Cordyceps militaris from a reputable supplier. Do not buy spores. Spore syringes contain randomized genetics that always produce inconsistent yields. Liquid culture provides isolated and proven commercial tissue that guarantees a dense canopy of medicinal clubs. If you're unfamiliar with the species, review the differences between Cordyceps militaris and sinensis before ordering your genetics.
Step-By-Step Cultivation Process
The growing cycle breaks down into five controlled phases. Each stage demands completely different environmental parameters. Focus heavily on cleanliness.
Phase 1 Nutrient Broth Formulation
Mix the distilled water with the malt extract and nutritional yeast in a large pitcher. Stir the fluid vigorously until the powders dissolve. Measure exactly 35 grams of dry brown rice into each pint jar. Pour 45 milliliters of the prepared liquid straight over the unwashed grains. Do not cook the rice beforehand. The upcoming sterilization cycle will force the moisture into the kernels perfectly, creating an ideal texture that lets the fungal tissue breathe and expand without suffocating in a puddle of muddy water.
Phase 2 Sterilization Protocol
Place the metal lids on the glassware. Punch a single quarter-inch hole in each lid and cover it tight with micropore tape. This little filter allows carbon dioxide to escape while blocking airborne mold contaminants from falling in. Load the sealed vessels into the pressure cooker. Process the whole batch at 15 psi for 45 minutes. Let the machine depressurize naturally. Opening the valve prematurely causes rapid boiling inside the sealed jars, forcing the sticky nutrient broth up through the filter tape and permanently ruining the protective barrier before the cycle even begins.
Phase 3 Sterile Inoculation
Sanitize the work area with the isopropyl alcohol. Scrub your hands thoroughly. Shake the liquid culture syringe hard to break apart the floating clumps of white fungal tissue. Lift the edge of the filter tape swiftly to slide the needle straight into the jar. Inject two milliliters of fluid onto the rice. Replace the tape instantly. Working inside a dedicated still air box drastically reduces the chances of microscopic dust particles falling into the pristine substrate and destroying the project before the exposed mycelium ever wakes up.
Phase 4 The Colonization Window
Move the freshly inoculated containers into a dark closet. The ambient temperature needs to sit consistently around 68 degrees Fahrenheit. The fungus requires absolute darkness to simulate the internal environment of a buried caterpillar. Over the next 14 days a thick layer of white fluff will rapidly consume the grain block. A 2023 study in the Journal of Fungi indicates that ambient temperatures rising above 75 degrees Fahrenheit during this delicate incubation stage will permanently stunt the fungus and severely limit the overall harvest weight. Keep the jars still.
Phase 5 Fruiting and Maturation Triggers
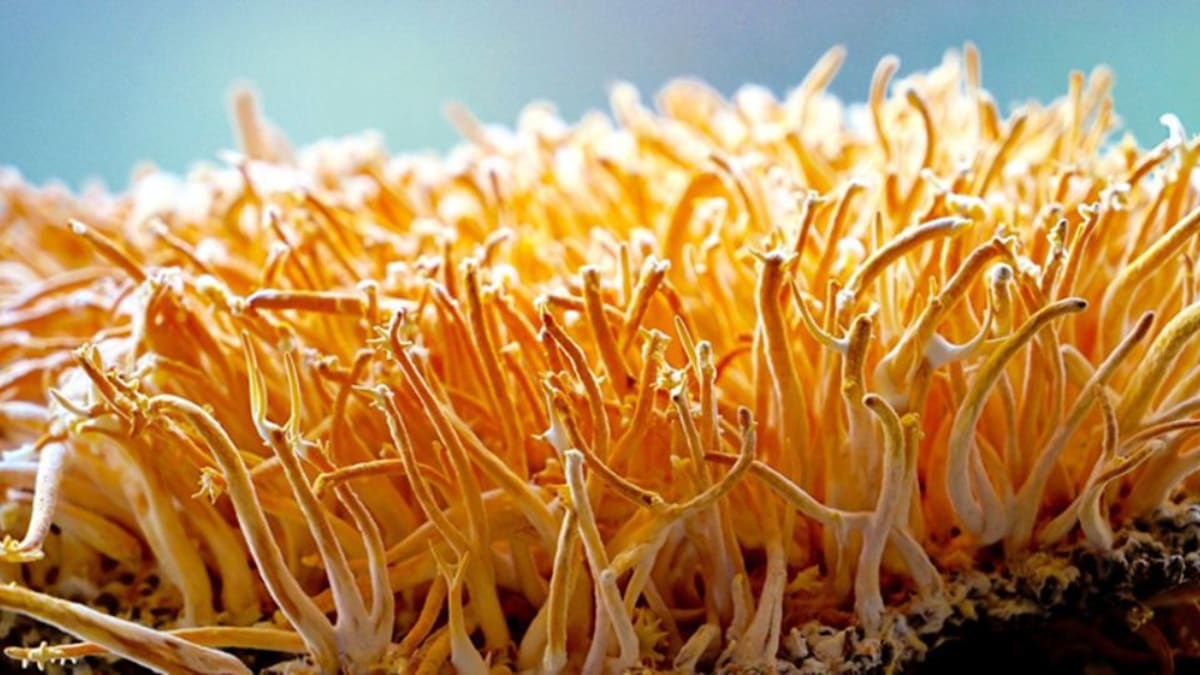
Small orange bumps will suddenly erupt across the white surface. Mycologists call these clusters primordia. The fungus now needs intense illumination. Expose the containers to 12 hours of LED light every single day. Drop the room temperature down to 65 degrees. This abrupt shift in parameters mimics the arrival of autumn weather out in the mountains. The fungus reacts to the sudden simulated seasonal change by sending up bright orange clubs in a swift biological attempt to release millions of cellular spores into the surrounding air. We maintain these conditions right up until day 60.
Harvesting and Storage
Pulling the crop at the exact right moment maximizes the medicinal potency. Look closely at the tips of the orange clubs. Tiny color changes indicate maturity. When dark specks finally appear on the upper surfaces, the fruit bodies are ready. These specks are the perithecia. They hold the spores.
Twist and pull the clubs gently to detach them from the grain block. Discard the leftover rice mass, though some adventurous growers choose to fry and eat it. Fresh mushrooms degrade fast. You have to preserve them immediately.
Lay the harvested material flat on the racks of a food dehydrator. Set the machine to 100 degrees Fahrenheit and run it continuously for about 15 hours. High heat destroys the fragile cordycepin molecules, so low and slow drying always produces a medically potent product. Once the clubs snap cleanly in half without bending at all, pack them tightly into airtight glass mason jars alongside a commercial silica gel packet to lock out any residual atmospheric humidity.
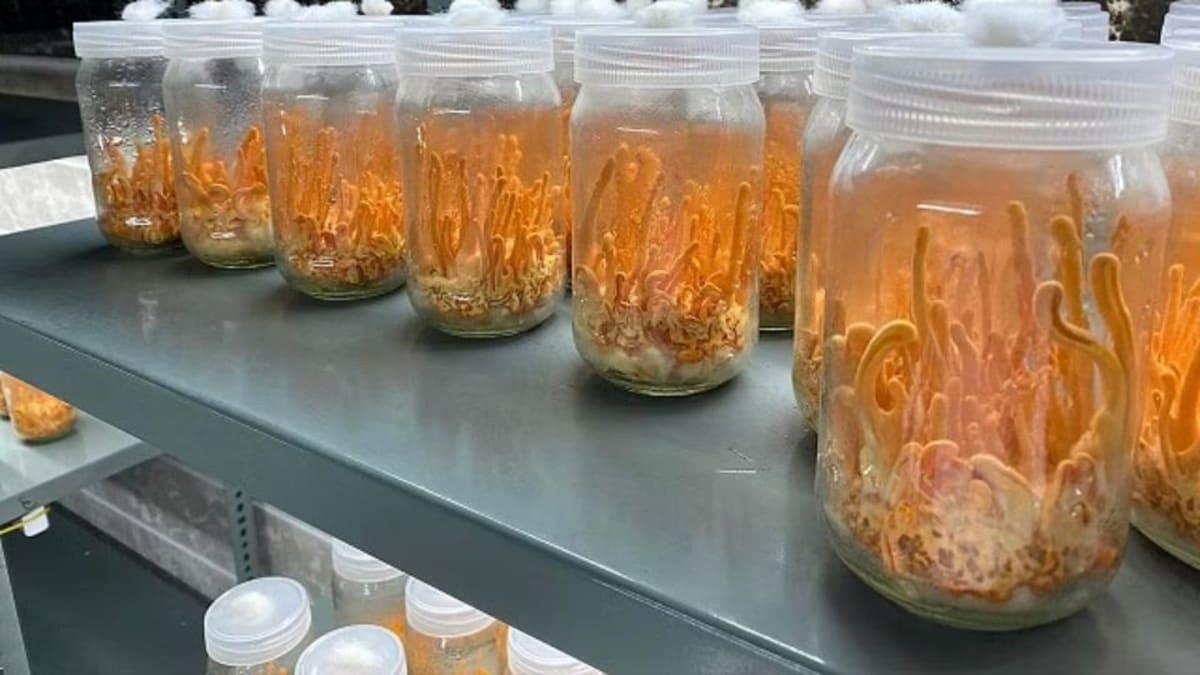
Jars Versus Bulk Bins
Many beginners struggle to choose between the two main container formats. We tested both approaches extensively in our grow space. Glass pints isolate contamination well. If one vessel develops a patch of green mold, you can easily toss that single unit out without losing the remainder of the crop. The actual harvest does require more physical effort, as plucking delicate clubs from deep inside narrow glassware really tests the patience.
Bulk plastic tubs increase the overall harvest weight drastically. A standard shoebox-sized tote holds ten times the substrate volume of a standard pint glass. The risk scales up accordingly. A single invisible bacterial cell can quickly ruin a ten-pound block of material in a matter of days. All new cultivators should start out with smaller glassware to build the mandatory clean handling skills before ever risking their expensive liquid genetics on massive, unforgiving plastic bins.
Troubleshooting Common Mistakes
Growing fungi at home comes with a steep learning curve. Total crop failures happen to everyone. Wet rot is the most frequent issue we encounter. This bacterial infection occurs when the grain base holds too much moisture. The rice turns into a foul-smelling mush that suffocates the developing fungal network. Always measure the hydration fluid precisely with a graduated cylinder rather than estimating the volume by eye.
Stalled growth is another major hurdle. The mycelium suddenly stops expanding outward. This usually means excessive carbon dioxide is pooling heavily at the bottom of the container, which starves the living tissue of oxygen and halts all biological progression entirely. Adding proper ventilation holes covered with breathable tape ensures a steady supply of fresh oxygen reaches the growing mass while simultaneously keeping competing airborne mold spores out of the growing environment.
A lack of fruiting points directly to lighting problems. The white block remains barren. If the primordia never form, the fungus is not receiving enough daily illumination to trigger the necessary morphological changes. Check the timer on the LED strips. The fungi absolutely require a consistent 12-hour cycle of bright light to finish the reproductive sequence.
Frequently Asked Questions

A dedicated wellness researcher who spent decades cataloging the impact of forest-based nutrition on human aging. Ashley doesn't care about trends; she cares about the data.
References & Further Reading
- Diversity 2024 — Diversity (2024)
- Journal of Fungi 2023 — Journal of Fungi (2023)