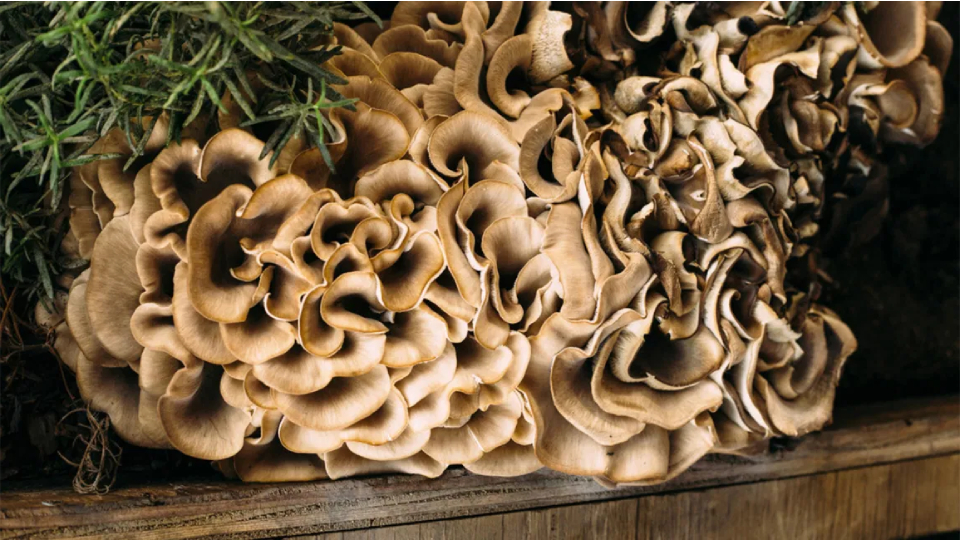
Growing Maitake Mushrooms At Home
Growing mushrooms at home is gaining popularity among gardeners and mushroom enthusiasts worldwide. Maitake mushrooms, also known as Hen of the Woods, are a popular edible and medicinal fungus with a rich, earthy flavor. They are used in various dishes.
In this article, we will provide a comprehensive guide on how to grow maitake mushrooms step-by-step and explore the benefits of cultivating these delicious fungi.
In this article:
Maitake Mushrooms Naturally Growing In The Wild
Maitake mushrooms can be found growing naturally in the wild, particularly in the temperate forests of North America and Japan. They grow in clusters at the base of trees, particularly oaks, elms, and maples.
Between early September and early November, you can easily find abundant growth of this mushroom in the woods. The mushroom grows naturally on trees, especially older oaks with dying branches.
Additionally, it is not uncommon to spot them in dead stumps near water. When you come across one, chances are that you will not find it growing alone. Most likely, there will be several fruit bodies growing in the same location.
If you pick the mushroom from where you find it and return the following growing season, you can almost guarantee that more will be growing back in the same location.
How to Grow Maitake Mushrooms
You can grow maitake mushrooms both indoors and outdoors using various techniques. You can pick one out of these four methods.
- Growing on logs
- From cuttings
- Sawdust Spawn
- Using Growing Kits
4 Best Ways to Grow Maitake Mushrooms
1. Grow Maitake Mushrooms on logs
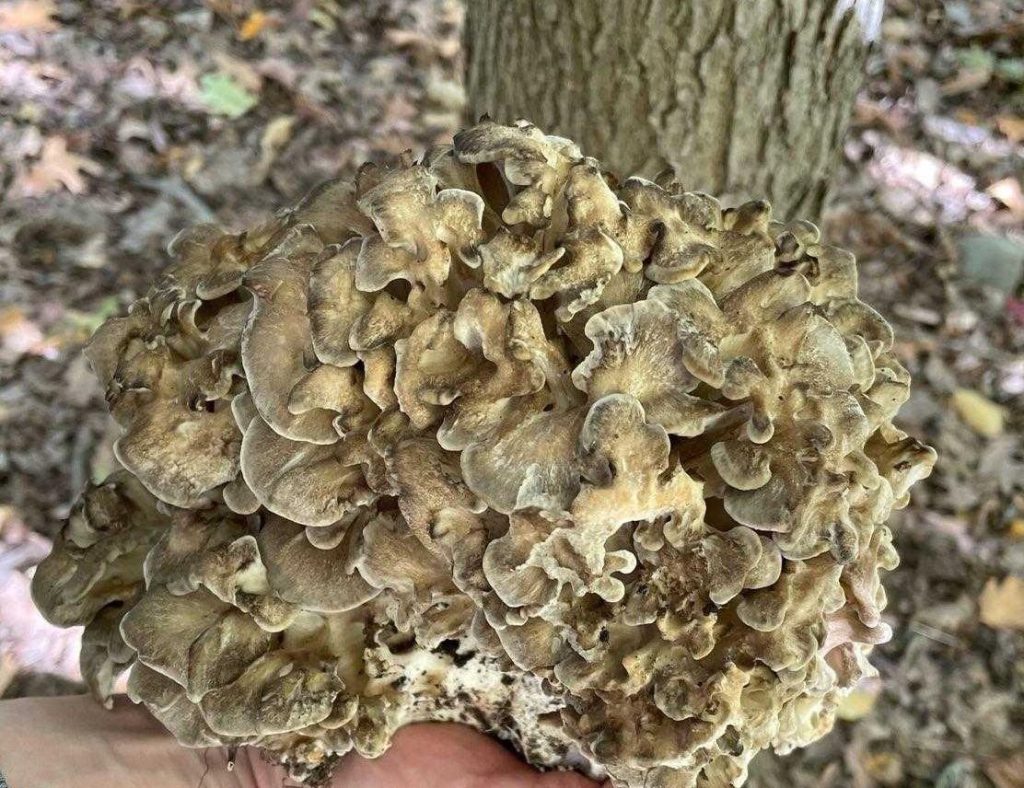
Maitake mushrooms thrive in the vicinity of hardwood trees aged between 15 and 25 years. These mushrooms typically prefer trees that have a lifespan ranging from 40 to 110 years.
Step 1: Select suitable logs
Choose fresh hardwood logs, such as oak or maple, with a diameter of 6 to 8 inches and a length of 3 to 4 feet. Ensure the logs are healthy and free from any signs of disease or decay.
Step 2: Obtain Maitake mushroom spawn
Purchase Maitake mushroom spawn from a reputable supplier. Spawn consists of the mycelium, which is the vegetative part of the fungus.
Step 3: Prepare the logs
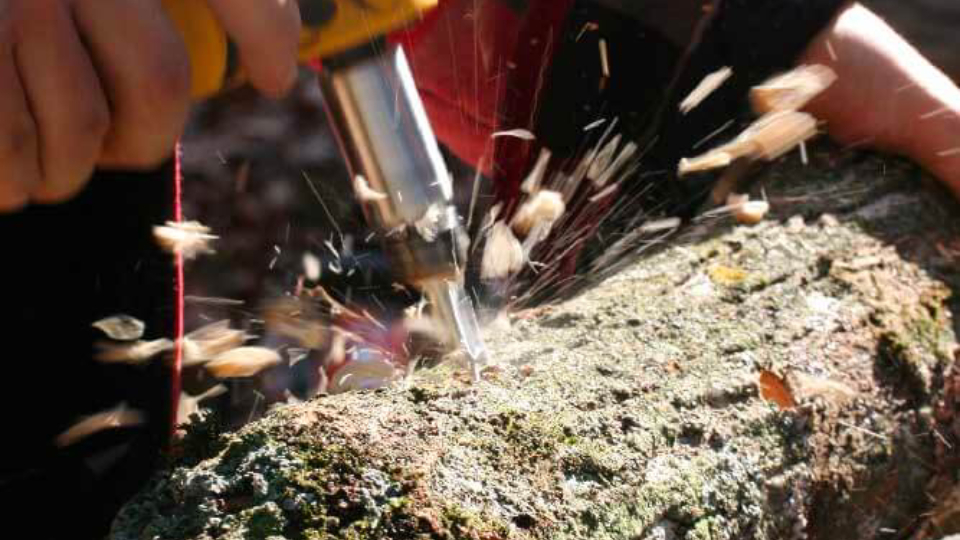
Using a drill and a 5/16-inch drill bit, create holes in a diamond-shaped pattern on the surface of each log. Space the holes approximately 4 to 6 inches apart and make them about 1 inch deep.
Step 4: Inoculate the logs
Take small pieces of Maitake mushroom spawn and insert them into the drilled holes. Gently tap the spawn into the holes to ensure good contact with the wood. Repeat this process for all the holes on each log.
Step 5: Seal the spawn
Cover the spawn-filled holes with food-grade wax or cheese wax to create a protective barrier. This helps retain moisture and prevents contamination while the mycelium colonizes the logs.
Step 6: Stack the logs
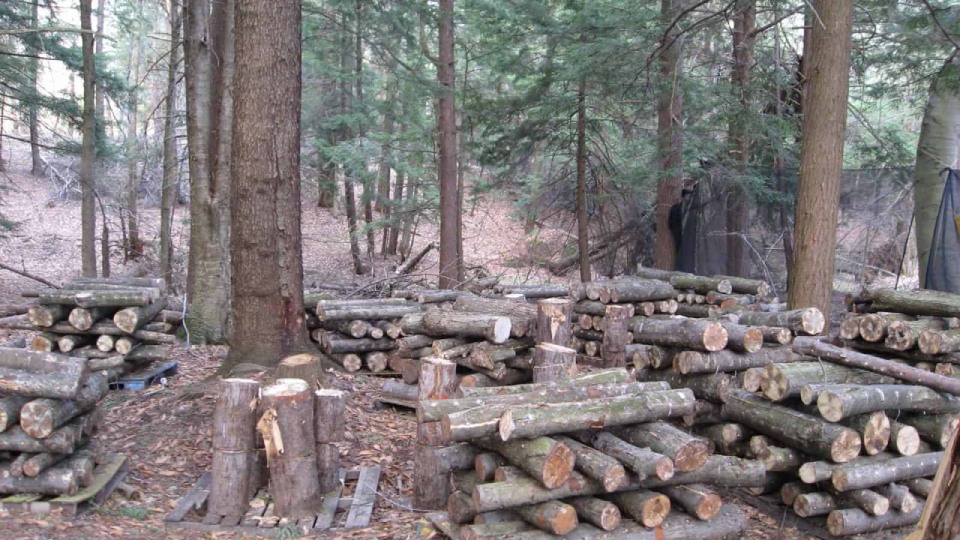
Arrange the inoculated logs in a shaded area or a designated mushroom-growing area. Stack the logs in a crisscross pattern to allow air circulation between them. Elevate the logs slightly off the ground using rocks or wooden blocks.
Step 7: Maintain moisture
Regularly check the moisture level of the logs. If they appear dry, mist them with water to keep them adequately moist. Avoid excessive watering, as it can lead to rot or other issues.
Step 8: Provide shade and airflow
Ensure the logs are placed in a shaded area, as direct sunlight can dry them out. Maintain proper airflow around the logs to prevent excessive moisture buildup and reduce the risk of contamination.
Step 9: Be patient and wait for colonization
It takes time for the mycelium to colonize the logs. This process can take several months to a year. Be patient and regularly inspect the logs for signs of white mycelium growth, which indicates successful colonization.
Step 10: Harvest the Maitake mushrooms
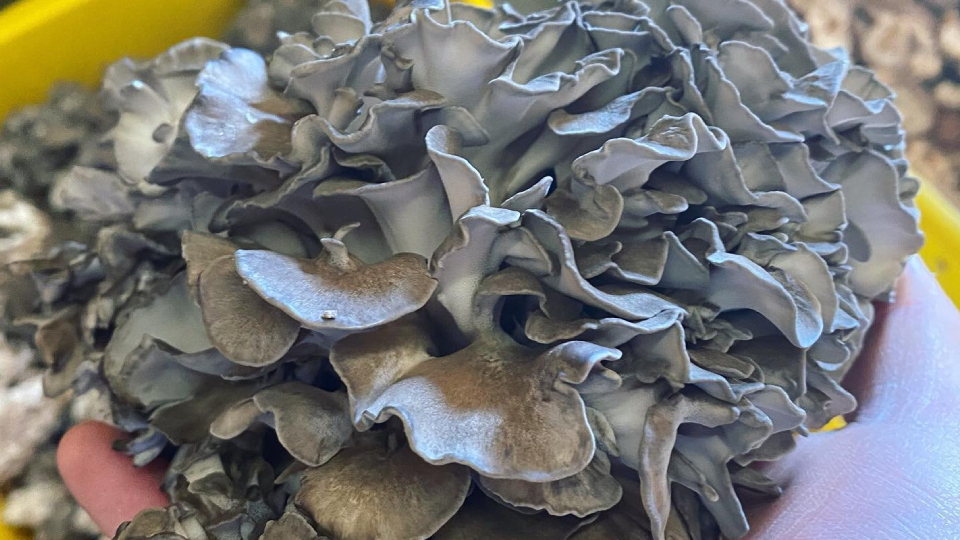
Once the logs are fully colonized with mycelium, Maitake mushrooms will start to emerge. Harvest the mushrooms by carefully cutting them at the base of the stem using a clean knife or scissors. Allow some mushrooms to remain for future harvests.
2. Grow Maitake Mushrooms From Cuttings
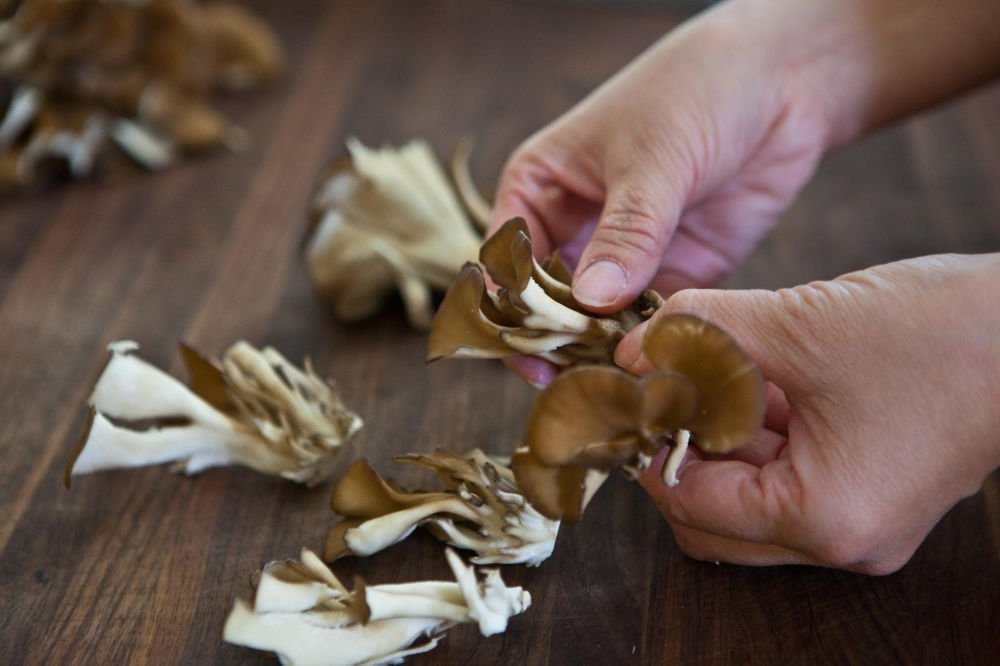
Growing Maitake mushrooms from cuttings is a quick and simple method with faster results compared to growing from logs.
Step 1: Prepare the materials
Gather the necessary materials for growing Maitake mushrooms from cuttings.
You will need:
- Fresh Maitake mushroom cuttings
- A clean and sterile growing medium (such as sawdust or straw)
- A large container or growing bed
- A spray bottle filled with water
- A plastic bag or cover to create a humid environment
Step 2: Select healthy Maitake mushroom cuttings
First, locate fresh and clean Maitake mushrooms that are at least 3 inches across the cap, ideally with firm and intact caps. Look for mushrooms that are free from blemishes or signs of disease. Selecting high-quality cuttings will increase the chances of successful growth.
Step 3: Prepare the growing medium
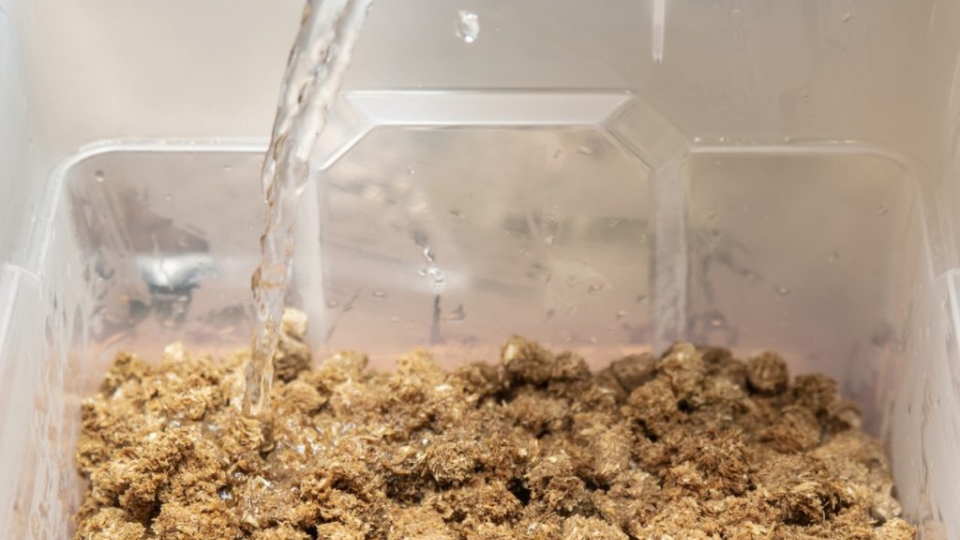
Prepare the growing medium by moistening it slightly. If using sawdust, soak it in water overnight and then drain it thoroughly. If using a straw, dampen it with water until it is evenly moist but not dripping. Maintaining proper moisture levels is crucial for successful mushroom growth.
Step 4: Cut and prepare the Maitake mushroom cuttings
Using a clean knife or scissors, carefully cut off the mushroom caps from the stems, leaving a small section of the stem attached to the cap. The stem piece will contain mycelium, which is necessary for growth. Remove any remaining dirt or debris from the caps.
Step 5: Create a suitable growing environment
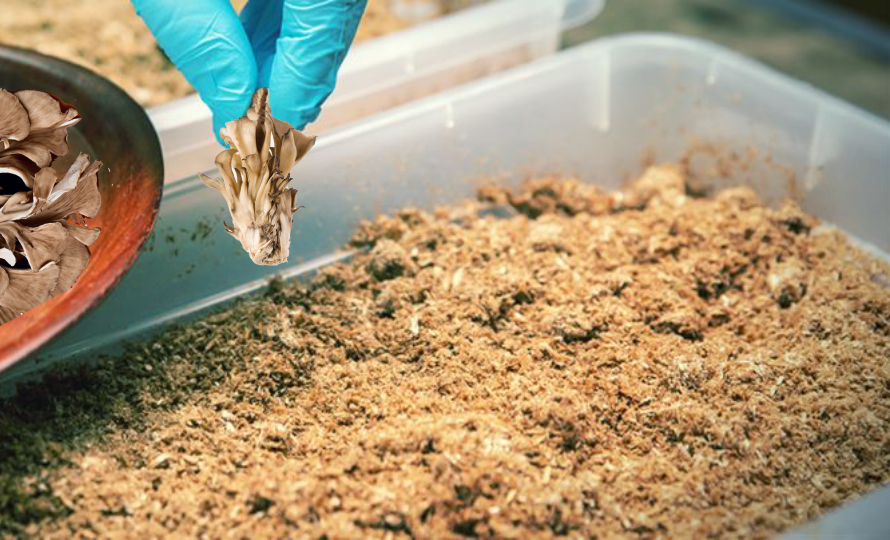
Prepare a container or growing bed by lining it with a layer of the moistened growing medium. Place the Maitake mushroom cuttings on top of the medium, spacing them apart to allow proper air circulation. Cover the cuttings with another layer of the moistened growing medium, ensuring they are fully buried.
Step 6: Maintain humidity and moisture
Spray the growing medium and the Maitake mushroom cuttings with water using a spray bottle to ensure they remain moist. The moisture will help the mycelium spread and establish itself. Cover the container or growing bed with a plastic bag or a plastic cover to create a humid environment. This will help retain moisture and create the ideal conditions for growth.
Step 7: Provide proper temperature and lighting conditions
Place the container or growing bed in a suitable location with consistent temperatures ranging from 60 to 70 degrees Fahrenheit (15 to 21 degrees Celsius). Avoid direct sunlight but ensure the area receives indirect light or low-intensity artificial light.
Step 8: Monitor and mist regularly
Check the growing medium daily to ensure it remains moist. If it begins to dry out, mist it with water to maintain the desired humidity level. Be careful not to overwater, as excessive moisture can lead to contamination or rot.
Step 9: Allow time for mycelium growth
Be patient and allow time for the mycelium to grow and colonize the growing medium. This process can take several weeks. During this period, the mycelium will spread and eventually form small mushroom pinheads.
Step 10: Harvest the Maitake mushrooms
Once the mushroom pinheads have fully developed into mature mushrooms, they are ready to be harvested. Carefully cut them at the base of the stem using a clean knife or scissors. Harvesting the mushrooms at the right time will ensure optimal flavor and texture.
3. Grow Maitake Mushrooms From Sawdust Spawn
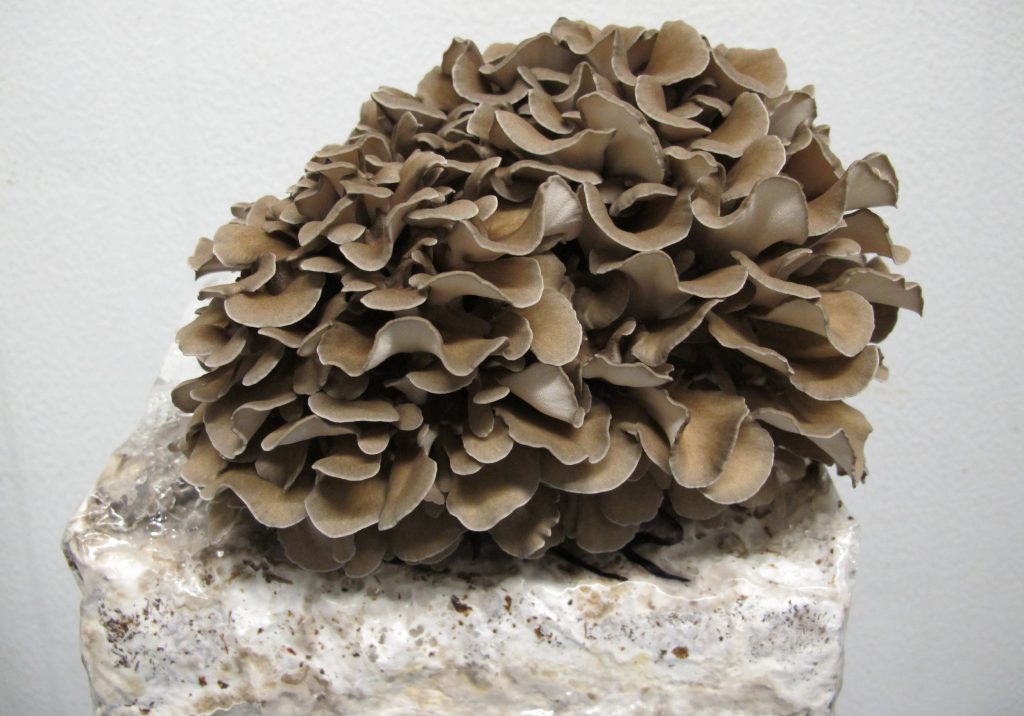
This method is quite similar to the dowel spawn approach, but instead of dowels, you’ll utilize compacted hardwood sawdust pellets. These pellets will be infused with mushroom mycelium or a combination of both.
Step 1: Gather the materials
Collect the necessary materials for growing Maitake mushrooms from sawdust spawn.
You will need:
- Maitake mushroom sawdust spawn
- A suitable substrate (such as hardwood sawdust or wood chips)
- A large container or growing bed
- A spray bottle filled with water
- And a plastic bag or cover to create a humid environment
Step 2: Prepare the substrate
Prepare the substrate by sterilizing it to eliminate any competing organisms. You can do this by placing the substrate in a large pot or container and adding water until it is fully submerged. Heat the water to a rolling boil and continue boiling for about 30 minutes. Drain the substrate and let it cool completely.
Step 3: Mix in the sawdust spawn
Once the substrate has cooled, transfer it to a clean and sterile container or growing bed. Sprinkle the Maitake mushroom sawdust spawn evenly throughout the substrate. Use your hands or a clean utensil to mix the spawn thoroughly into the substrate, ensuring an even distribution.
Step 4: Create a suitable growing environment
Cover the container or growing bed with a plastic bag or plastic cover to create a humid environment. This will help retain moisture and create the ideal conditions for the mycelium to grow. Poke small holes in the plastic to allow for proper air circulation.
Step 5: Maintain humidity and moisture
Use a spray bottle filled with water to mist the substrate and the inside of the plastic cover. This will help maintain the required humidity levels for the mycelium to thrive. Check the moisture levels regularly and mist as needed to keep the substrate moist, but avoid overwatering.
Step 6: Provide proper temperature and lighting conditions
Place the container or growing bed in a suitable location with consistent temperatures ranging from 60 to 70 degrees Fahrenheit (15 to 21 degrees Celsius). Ensure the area receives indirect light or low-intensity artificial light. Avoid direct sunlight, as it can overheat the substrate.
Step 7: Monitor and wait for mycelium growth
Check the container or growing bed regularly for signs of mycelium growth. Over time, you will notice white, thread-like filaments spreading throughout the substrate. This indicates that the mycelium is colonizing the sawdust spawn.
Step 8: Maintain the ideal environment
Continue misting the substrate and monitoring the moisture levels. Ensure that the plastic cover remains in place to retain humidity. Adjust the ventilation by opening or closing the holes in the cover to maintain the desired airflow.
Step 9: Allow time for colonization
Be patient and allow the mycelium to fully colonize the substrate. This process can take several weeks to a few months, depending on the conditions. The mycelium will continue to grow and strengthen its network within the substrate.
Step 10: Induce fruiting
Once the substrate is fully colonized with mycelium, it is time to induce fruiting. Reduce the humidity by removing the plastic cover or creating small openings. Maintain a temperature of around 50 to 60 degrees Fahrenheit (10 to 15 degrees Celsius) to simulate the onset of autumn.
Step 11: Harvest the Maitake mushrooms
After a period of fruiting induction, small mushroom pinheads will start to emerge. As they develop, monitor their growth and harvest them at the desired size. Carefully cut the mature mushrooms at the base of the stem using a clean knife or scissors.
4. Grow Maitake Mushrooms With Growing Kits
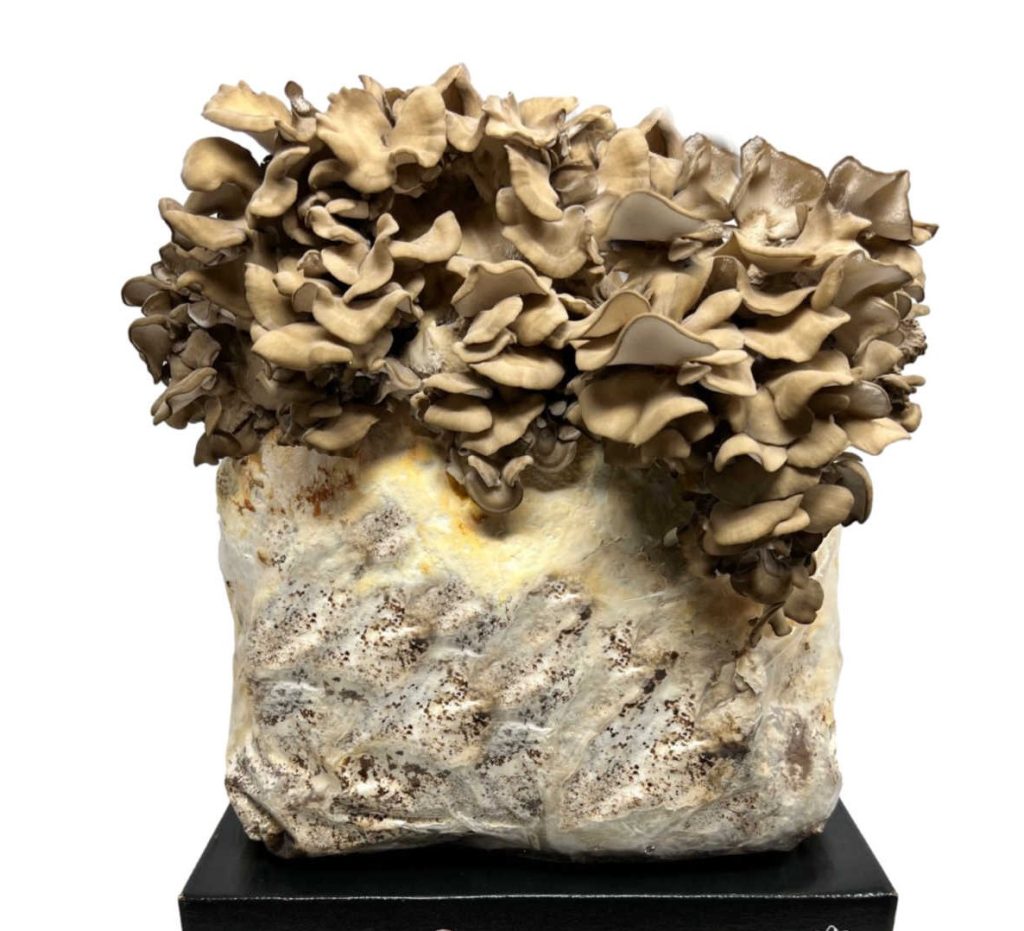
Growing kits offer an ideal solution for individuals who prefer not to engage in the labor-intensive tasks of tree cutting and other related work. It provides a convenient and beginner-friendly way to cultivate Maitake mushrooms.
Step 1: Acquire a Maitake mushroom growing kit
Obtain a Maitake mushroom growing kit from a reputable supplier or garden center. The kit typically includes a pre-inoculated substrate, a growing container, and instructions. Ensure that the kit is fresh and within the recommended expiration date.
Step 2: Prepare the growing container
Open the growing kit and assemble the provided growing container according to the instructions. Clean the container with warm water and mild soap to ensure it is free from contaminants. Rinse thoroughly and allow it to dry completely before proceeding.
Step 3: Activate the substrate
Remove the lid from the substrate container included in the kit. Mist the substrate lightly with water using a spray bottle to rehydrate it. Allow the substrate to absorb the moisture for the recommended time mentioned in the kit’s instructions.
Step 4: Spread the substrate in the growing container
Transfer the rehydrated substrate from the container into the prepared growing container. Spread it evenly to create a level surface. Ensure that the substrate is evenly distributed to promote uniform mushroom growth.
Step 5: Provide suitable environmental conditions
Place the growing container in a location with consistent temperatures ranging from 60 to 70 degrees Fahrenheit (15 to 21 degrees Celsius). Ensure the area receives indirect light or low-intensity artificial light. Avoid direct sunlight, as it can overheat the substrate.
Step 6: Maintain humidity and moisture
Check the moisture level of the substrate regularly. If it appears dry, mist it lightly with water using a spray bottle to maintain proper moisture levels. Avoid overwatering, as excessive moisture can lead to contamination or mold growth.
Step 7: Monitor the growth progress
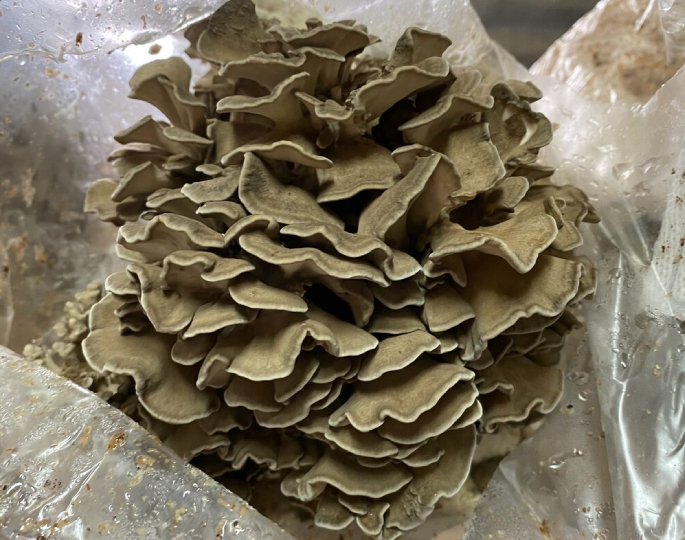
Observe the growing container regularly for signs of mycelium growth. The mycelium will appear as white, thread-like filaments spreading throughout the substrate. This indicates that the Maitake mushrooms are colonizing the substrate.
Step 8: Adjust the environment for fruiting
Follow the instructions provided with the growing kit to induce fruiting. This may involve reducing humidity levels or adjusting the temperature to simulate the onset of autumn. Adhere to the specific recommendations mentioned in the kit for optimal results.
Step 9: Allow time for fruiting
Be patient and allow time for the mushrooms to develop. This stage may take several weeks or longer, depending on the specific instructions provided with the growing kit. The mushrooms will gradually emerge from the substrate and develop into mature Maitake mushrooms.
Step 10: Harvest the Maitake mushrooms
Once the Maitake mushrooms have reached their desired size and maturity, carefully cut them at the base of the stem using a clean knife or scissors. Harvesting at the right time will ensure optimal flavor and texture.
What are Maitake Mushrooms?
Maitake mushrooms, scientifically known as Grifola frondosa, also known as “hen of the woods,” are a type of edible mushroom that grows in clusters at the base of trees, particularly oak trees. These mushrooms have a distinct appearance with a frilly, overlapping cap that can grow to be quite large, sometimes weighing up to 50 pounds.
These mushrooms are not only delicious but also known for their potential health benefits. They contain beta-glucans, which are believed to have immune-boosting properties and may also have anti-cancer effects. Maitake mushrooms are also a good source of vitamins B and D, as well as minerals like potassium, calcium, and magnesium.
Understanding The Maitake Mushrooms
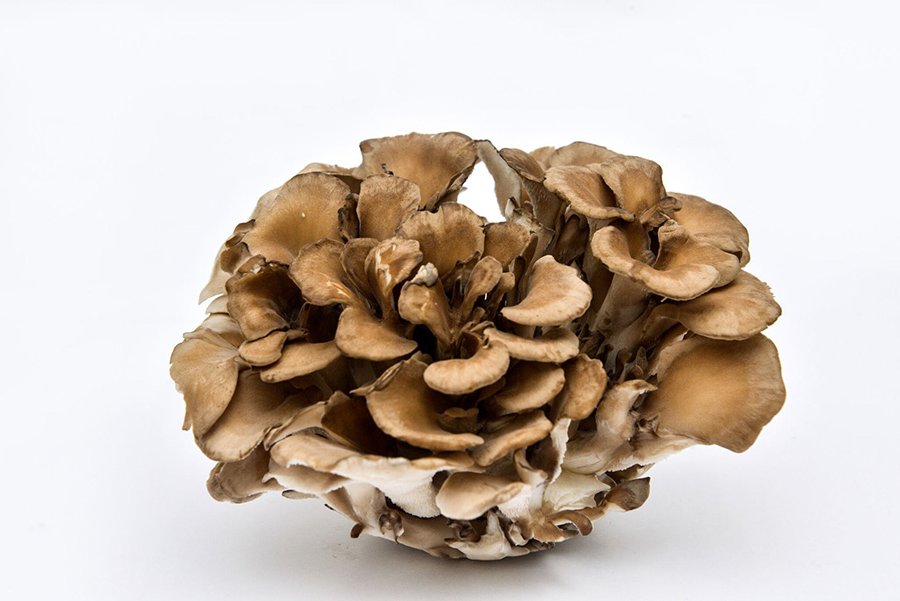
To ensure your success in growing mushrooms, it is important to familiarize yourself with their parts and terms. These will be frequently mentioned in this guide and understanding them will be crucial. By gaining a better understanding of mushrooms, you can make informed decisions that will improve your overall results.
Cap – The cap of the maitake mushroom is typically fan-shaped and can grow up to 50 cm in diameter. It is usually light brown to greyish-brown in color, with a slightly fuzzy surface.
Fruit Body – The fruit body of the maitake mushroom is large and leafy, often forming clusters of overlapping caps that resemble a hen’s feathers, hence the name hen of the woods.
Stem – The stem of the maitake mushroom is often thick, and white, and can grow up to 10 cm in length. It is usually attached to the underside of the cap.
Flesh – The flesh of the maitake mushroom is firm and dense, with a meaty texture that makes it a popular meat substitute.
Spores – The spores of the maitake mushroom are white and oval-shaped.
Health Benefits of Maitake Mushrooms
Maitake mushrooms provide a range of health benefits that can boost your well-being. Firstly, these mushrooms have immune-boosting properties, stimulating the activity of immune cells[1].
Additionally, Maitake mushrooms aid in managing blood sugar levels, making them beneficial for diabetes management[2]. They also possess anti-inflammatory properties, reducing inflammation in the body and potentially preventing chronic conditions[3].
Furthermore, Maitake mushrooms are rich in vitamins, minerals, and antioxidants, supporting overall health, skin, bones, and brain function[4]. Enjoy Maitake mushrooms by sautéing, stir-frying, or adding them to soups and stews. Incorporating these mushrooms into your diet can enhance your health and vitality.
Other potential health benefits of maitake mushrooms include:
- Lowering blood pressure
- Reducing the risk of cancer
- Improving insulin sensitivity
- Promoting weight loss
Remember to choose fresh, organic mushrooms and cook them thoroughly for maximum benefits. Embrace the health benefits of Maitake mushrooms and improve your well-being.
How to Fruit Maitake Mushrooms?
In the video above, Paul Stamets demonstrates how Maitake mushrooms fruit. These mushrooms typically emerge in the fall, with cooler temperatures and increased humidity. To promote fruiting, maintain a cool and humid growing environment, and regularly mist the mushrooms.
To fruit Maitake mushrooms, follow these steps for a successful harvest. Firstly, create an optimal fruiting environment by providing indirect light, proper airflow, and maintaining a temperature range of 50-68°F (10-20°C).
Next, mist the growing substrate regularly to maintain humidity levels. As the mycelium colonizes the substrate, small pinheads will begin to form. These pinheads will gradually develop into mature Maitake mushrooms.
Harvesting Maitake Mushrooms
Harvesting Maitake mushrooms is an exciting and rewarding process. When the mushrooms reach their desired size, typically with flattened caps and curled edges, it’s time to harvest.
Using a sharp knife or shears, cut the mushrooms close to the base, taking care not to damage the surrounding area. Transitioning from the growing to the harvesting stage signifies the culmination of your efforts. Proper harvesting techniques ensure a successful and continuous yield.
Cleaning Maitake Mushrooms
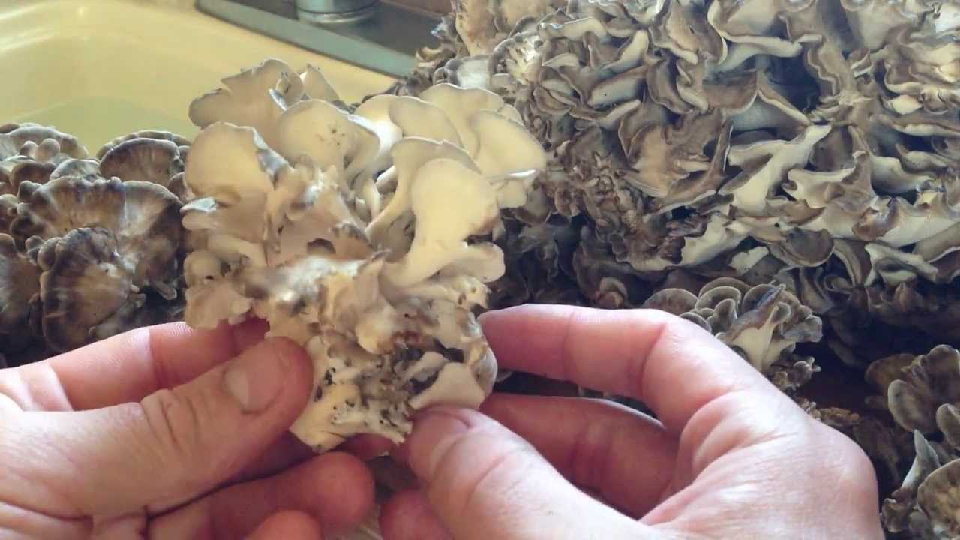
The cleaning process is simple and helps eliminate any dirt or debris that may have accumulated on the mushroom surface. Here’s a step-by-step guide:
1. Preparation
Begin by gathering all the necessary tools: a soft brush or cloth, a sharp knife, and a clean workspace.
2. Brushing Off Debris
Gently brush the Maitake mushrooms with a soft brush or wipe them with a clean cloth to remove any visible dirt or debris. This process ensures that the mushrooms are free from unwanted particles.
3. Inspecting for Spoilage
During the cleaning process, carefully examine the mushrooms for any signs of spoilage or decay. Discard any mushrooms that appear slimy, discolored, or have an unpleasant odor, as these may indicate deterioration.
4. Trimming the Stems
Using a sharp knife, trim the tough and woody parts of the mushroom stems. This step helps improve the overall texture and enhances the culinary experience.
5. Final Rinse (Optional)
While it is generally advised to avoid rinsing mushrooms due to their sponge-like texture, some individuals prefer a final quick rinse. If you choose to rinse, do it briefly under cold running water, ensuring not to soak the mushrooms. Pat them dry gently with a clean cloth before proceeding.
Storing Maitake Mushrooms
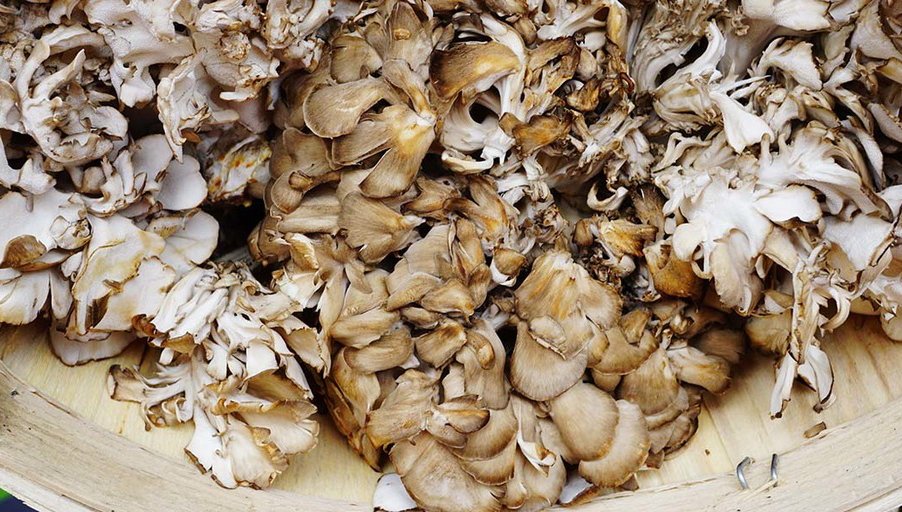
Proper storage techniques are crucial to preserve the freshness and flavor of harvested Maitake mushrooms. Whether you plan to use them immediately or store them for future use, following these guidelines will help extend their shelf life:
Short-Term Storage:
If you intend to use the Maitake mushrooms within a few days, store them in a paper bag or a loosely sealed container. Place them in the refrigerator’s vegetable crisper drawer to maintain cool temperatures and proper air circulation.
Long-Term Storage:
To store Maitake mushrooms for an extended period, it is best to dry or freeze them.
- Drying: Slice the mushrooms into thin, uniform pieces and lay them on a drying rack or a parchment-lined baking sheet. Ensure proper air circulation and place them in a well-ventilated area away from direct sunlight. The drying process can take several days to a couple of weeks, depending on the humidity levels in your environment. Once the mushrooms are thoroughly dried and crisp, store them in airtight containers in a cool, dark pantry.
- Freezing: Blanch the Maitake mushrooms briefly in boiling water for a minute or two. Transfer them immediately to an ice bath to halt the cooking process. Drain the mushrooms well and pat them dry with a clean cloth. Place them in freezer-safe bags or containers, removing as much air as possible. Label the packages with the date and store them in the freezer. Properly frozen Maitake mushrooms can retain their quality for up to six months.
FAQs – Growing Maitake Mushrooms At Home
Where Do Maitake Mushrooms Grow?
Maitake mushrooms primarily grow at the base of oak trees in deciduous forests. They can also be found near other hardwood trees like beech and maple. These mushrooms are typically found in the wild, but they can be cultivated in controlled environments or purchased from specialty stores.
Can you Grow Maitake Mushrooms at Home?
Yes, you can grow Maitake mushrooms at home. Purchase a Maitake mushroom growing kit or inoculated substrate from a reputable supplier. Follow the provided instructions for a controlled indoor environment with proper humidity and temperature. With care, you can successfully cultivate Maitake mushrooms in your own space.
Are Maitake Mushrooms (Hen-of-the-Woods) Easy to Grow?
Yes, Maitake mushrooms are relatively easy to grow. With proper instructions, materials, and care, you can successfully cultivate them at home. Following the recommended steps, maintaining the right conditions, and being patient will increase your chances of a successful harvest.
What is the Best Substrate for Maitake Mushrooms?
The best substrate for Maitake mushrooms is hardwood sawdust or wood chips. These materials provide a favorable environment for the mycelium to grow and develop. They offer the necessary nutrients and structure for the Maitake mushrooms to thrive. Ensure the substrate is clean, sterilized, and properly prepared before inoculation to maximize successful cultivation.
Where to Buy Hen of the Woods (Maitake) Mushrooms?
You can buy Hen of the Woods mushrooms at local farmers markets, specialty grocery stores, or online food retailers. Check with your nearby farms, organic markets, or mushroom suppliers for availability. Online platforms such as farmers’ websites, mushroom retailers, or even e-commerce platforms may offer a convenient way to purchase Hen of the Woods mushrooms and have them delivered to your doorstep.
Conclusion
To sum it up, cultivating Maitake mushrooms is both enjoyable and rewarding. We offer four effective methods to choose from, making your mushroom-growing journey easier. Whether you prefer log cultivation, cuttings, or a growing kit, following the correct steps is essential for success. Key tips include selecting suitable logs, ensuring proper treatment, and recreating Maitake’s natural growth conditions.
These mushrooms not only delight the palate but also offer health benefits, such as blood sugar regulation, immunity enhancement, and cholesterol reduction. They are packed with vitamin D, antioxidants, and other valuable compounds that can enhance your overall well-being. So why not give growing Maitake mushrooms a try and discover their numerous advantages?
References
1. Structural Elucidation and Immune-Enhancing Effects of Novel Polysaccharide from Grifola frondosa https://www.ncbi.nlm.nih.gov/pmc/articles/PMC6500627/
2. Health benefits of Grifola frondosa polysaccharide on intestinal microbiota in type 2 diabetic mice https://www.sciencedirect.com/science/article/pii/S2213453021000744
3. Structural properties and anti-inflammatory activity of purified polysaccharides from Hen-of-the-woods mushrooms (Grifola frondosa) https://www.researchgate.net/publication/368346795_Structural_properties_and_anti-inflammatory_activity_of_purified_polysaccharides_from_Hen-of-the-woods_mushrooms_Grifola_frondosa
4. Anti-Aging and Neuroprotective Properties of Grifola frondosa and Hericium erinaceus Extracts https://www.researchgate.net/publication/364434727_Anti-Aging_and_Neuroprotective_Properties_of_Grifola_frondosa_and_Hericium_erinaceus_Extracts

